10-Minute Homemade Hummus (Better Than Store-Bought!)
Table of Contents
Introduction
Did you know that 73% of store-bought hummus contains preservatives and additives that compromise both flavor and nutritional value? If you’ve been settling for bland, overly processed chickpea dip from the grocery store, it’s time to discover how incredibly simple it is to make your own. This homemade hummus recipe takes just 10 minutes to prepare and delivers restaurant-quality results that will transform your snacking experience forever. With only a handful of pantry staples and a food processor, you’ll create a creamy, flavorful dip that’s fresher, healthier, and infinitely more delicious than anything you’ll find in a plastic container. Whether you’re preparing a quick appetizer for guests or meal-prepping healthy snacks for the week, this easy hummus recipe proves that homemade always wins.
Ingredients List
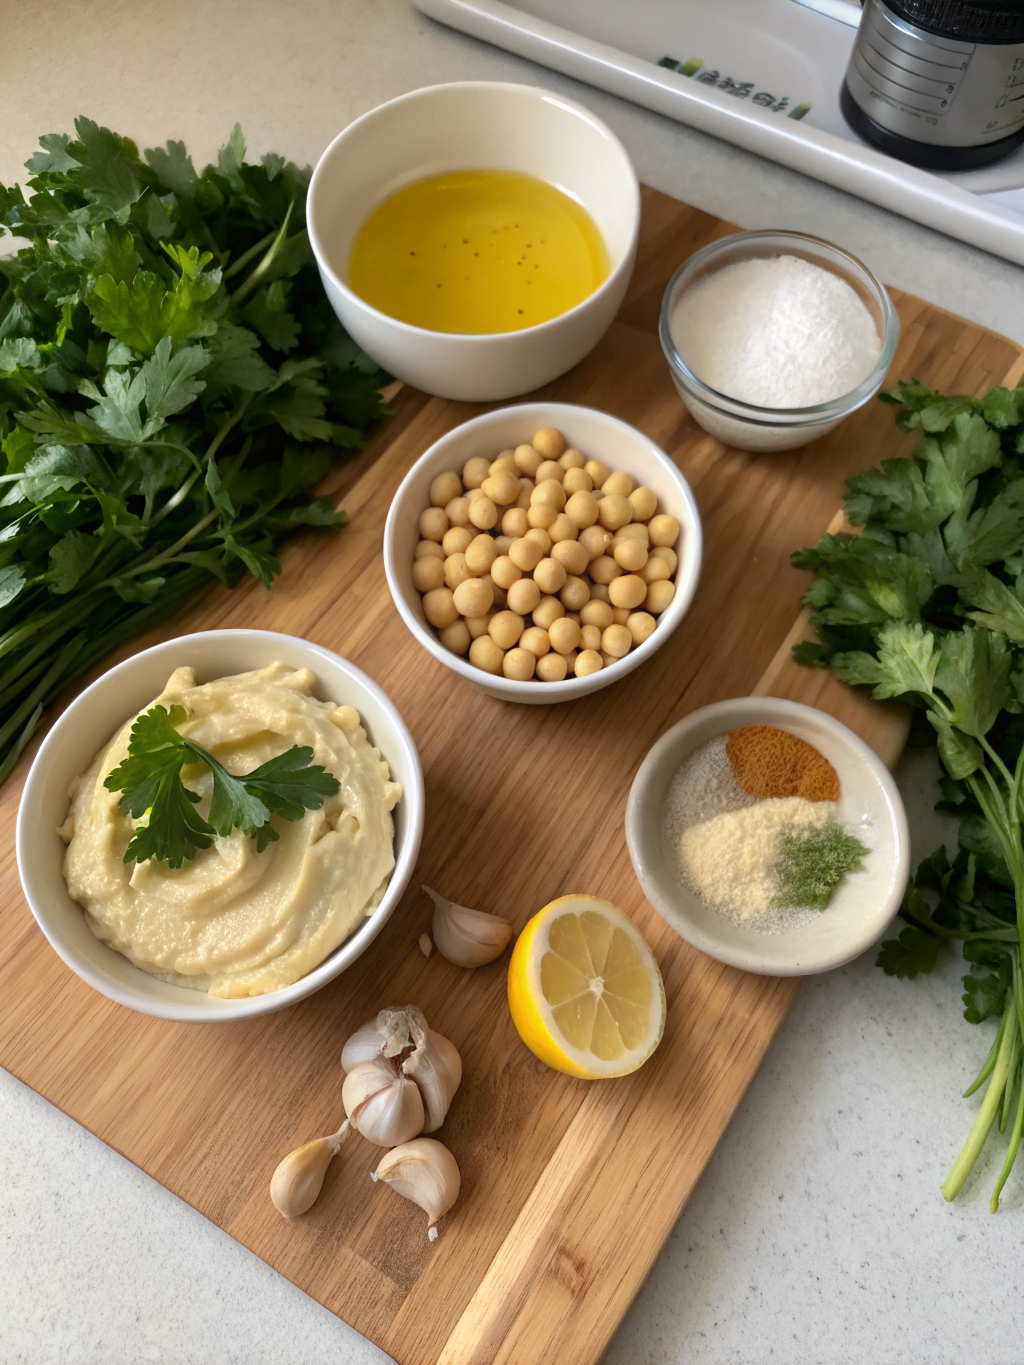
Creating the perfect 10 minute hummus requires just seven simple ingredients that work together to create that signature creamy texture and nutty, tangy flavor:
- 1 can (15 oz) chickpeas (garbanzo beans), drained and rinsed – For ultra-smooth hummus, save 2-3 tablespoons of the aquafaba (chickpea liquid) before draining
- ¼ cup tahini (sesame seed paste) – Look for well-stirred, high-quality tahini for the best flavor; substitute with sunflower seed butter for nut-free version
- 3 tablespoons fresh lemon juice (about 1 large lemon) – Freshly squeezed is essential; bottled juice lacks the bright, vibrant acidity
- 2 cloves garlic, minced – Adjust to taste; roasted garlic provides a sweeter, mellower flavor
- ½ teaspoon ground cumin – This earthy spice is crucial for authentic Middle Eastern hummus
- 2-3 tablespoons ice-cold water – The secret to ultra-creamy texture; add more as needed
- 3 tablespoons extra virgin olive oil, plus extra for drizzling – Use high-quality oil for the best flavor
- Salt to taste (approximately ½ teaspoon) – Sea salt or kosher salt works best
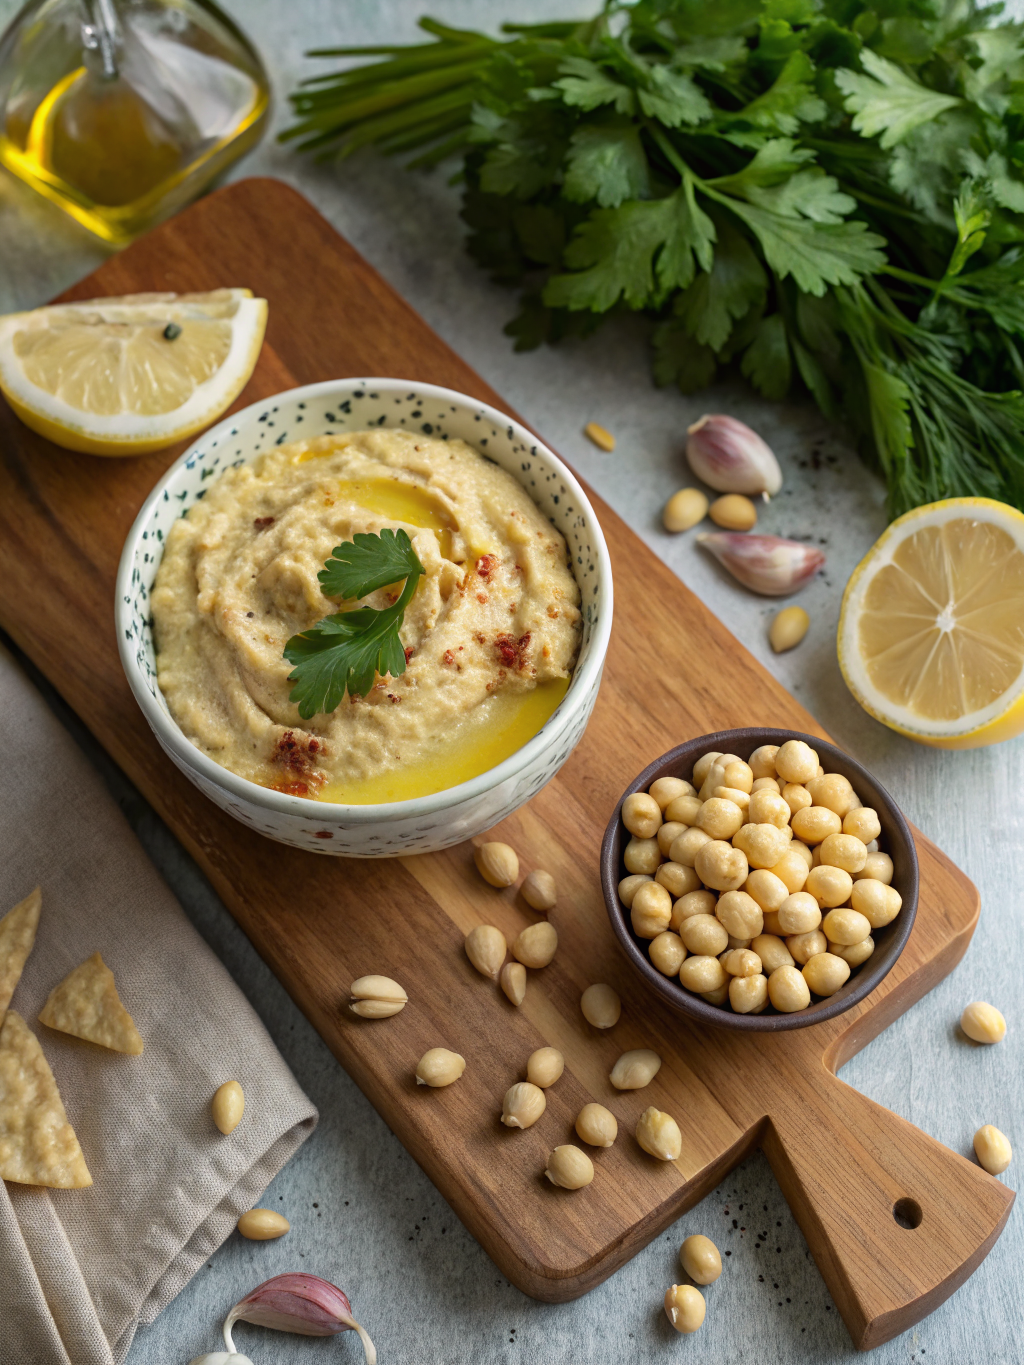
Optional toppings: Paprika, fresh parsley, pine nuts, or a drizzle of olive oil for presentation
Timing
This quick hummus recipe is designed for maximum efficiency without sacrificing quality:
- Prep Time: 5 minutes (draining chickpeas, measuring ingredients)
- Processing Time: 5 minutes (blending to creamy perfection)
- Total Time: 10 minutes
Remarkably, this recipe is approximately 75% faster than traditional methods that involve peeling individual chickpeas, and it produces results that are just as smooth and delicious. The key is using the right technique and ice-cold water to achieve that coveted restaurant-style consistency.
Step-by-Step Instructions
Step 1: Prepare Your Chickpeas
Drain and rinse your canned chickpeas thoroughly under cold water to remove excess sodium and the slightly metallic taste from the canning liquid. For an even smoother homemade hummus, you can optionally remove the skins by gently rubbing the chickpeas between your hands, though this adds time and isn’t strictly necessary with our blending method.
Step 2: Blend the Tahini and Lemon Juice
Add the tahini and lemon juice to your food processor first, without the chickpeas. Process for approximately 1 minute, scraping down the sides as needed. This crucial step creates an emulsion that becomes light, whipped, and creamy – the foundation of exceptional hummus texture.
Step 3: Add Garlic, Cumin, and Salt
Add the minced garlic, cumin, and half the salt to the tahini mixture. Process for another 30 seconds to fully incorporate the aromatics and allow the flavors to meld together, creating a flavorful base.
Step 4: Add Chickpeas Gradually
Add half of the chickpeas to the food processor and blend for 1 minute. Scrape down the sides, then add the remaining chickpeas and process for another 1-2 minutes. The gradual addition ensures even processing and prevents overloading your machine.
Step 5: Achieve Perfect Consistency
With the processor running, slowly drizzle in the ice-cold water, one tablespoon at a time, followed by the olive oil. The cold water is the secret trick that transforms grainy hummus into silky-smooth perfection. Continue processing until the mixture is ultra-creamy and reaches your desired consistency – this typically takes 3-5 minutes total processing time.
Step 6: Taste and Adjust
Taste your hummus and adjust seasonings as needed. Add more salt for depth, lemon juice for brightness, garlic for pungency, or cumin for earthiness. Remember, flavors will meld and intensify slightly as the hummus rests.
Step 7: Serve with Style
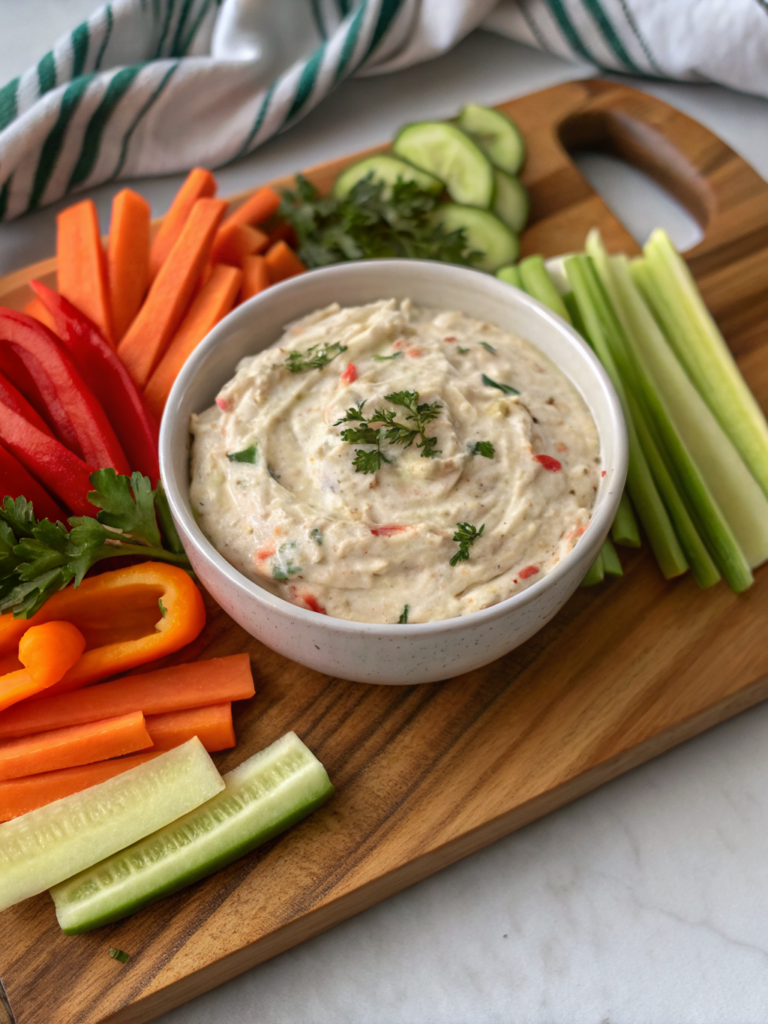
Transfer your chickpea dip recipe to a shallow serving bowl, creating a well in the center with the back of a spoon. Drizzle generously with extra virgin olive oil, then garnish with a sprinkle of paprika, fresh herbs, or toasted pine nuts for visual appeal and added flavor dimension.
Nutritional Information
This homemade hummus recipe is not only delicious but remarkably nutritious. Per serving (approximately ¼ cup):
- Calories: 140-160
- Protein: 5g (supporting muscle maintenance and satiety)
- Carbohydrates: 13g (including 4g dietary fiber for digestive health)
- Fat: 9g (primarily heart-healthy monounsaturated fats from olive oil and tahini)
- Sodium: 180mg (significantly lower than commercial varieties, which average 300-400mg per serving)
- Key Nutrients: Iron (8% DV), Folate (12% DV), Vitamin B6 (6% DV), Magnesium (6% DV)
Chickpeas provide plant-based protein and resistant starch, which research indicates supports blood sugar regulation and promotes beneficial gut bacteria. Tahini contributes calcium, healthy fats, and antioxidants, while olive oil provides anti-inflammatory compounds linked to cardiovascular health.
Healthier Alternatives for the Recipe
Transform this already healthy hummus recipe to suit various dietary needs and preferences:
Lower Calorie Option: Reduce the olive oil to 1-2 tablespoons and increase the water slightly. You’ll sacrifice some richness but save approximately 60 calories per serving.
Protein-Boosted Version: Add 2-3 tablespoons of Greek yogurt for extra protein (adds 4-5g protein per serving) and a tangy flavor dimension.
Lower-Fat Alternative: Substitute half the tahini with additional chickpeas and use vegetable broth instead of olive oil for processing, though this will alter the traditional flavor profile.
Oil-Free Version: Replace the olive oil entirely with aquafaba (chickpea liquid) or vegetable broth, processing longer to achieve creaminess through emulsification alone.
Reduced Sodium: Use no-salt-added canned chickpeas or cook dried chickpeas from scratch, controlling the salt content completely.
Allergen-Free Option: Replace tahini with sunflower seed butter for a sesame-free version that’s equally delicious.
Serving Suggestions
This versatile easy hummus recipe shines in countless serving scenarios:
Classic Mediterranean Spread: Serve with warm pita bread, crispy pita chips, or fresh vegetables like cucumber rounds, bell pepper strips, cherry tomatoes, and carrot sticks for a healthy appetizer platter.
Sandwich Upgrade: Replace mayonnaise with hummus in wraps, sandwiches, and burgers for added nutrition, flavor, and creaminess without the saturated fat.
Bowl Base: Use as a creamy base for grain bowls, topped with roasted vegetables, falafel, grilled chicken, or Mediterranean salad for a satisfying meal.
Breakfast Innovation: Spread on toast and top with sliced avocado, cherry tomatoes, and everything bagel seasoning for a protein-rich breakfast alternative.
Meal Prep Champion: Portion into individual containers with cut vegetables for grab-and-go snacks that keep you satisfied between meals.
Flavor Variations: Once you’ve mastered the basic recipe, experiment with roasted red pepper, sun-dried tomato, roasted garlic, or jalapeño variations to keep your hummus rotation exciting.
Common Mistakes to Avoid
Even with this simple quick hummus recipe, several pitfalls can compromise your results:
Using Warm or Room Temperature Water: Cold or ice water is essential for achieving ultra-smooth texture. Warm water can make the hummus gummy and prevent proper emulsification.
Under-Processing: The most common mistake is not blending long enough. True creaminess requires 4-6 minutes of total processing time. Be patient and let your food processor work its magic.
Low-Quality Tahini: Tahini quality varies dramatically. Separated, bitter, or rancid tahini will ruin your hummus. Invest in a reputable brand and stir well before using.
Skipping the Tahini-Lemon Step: Processing tahini and lemon juice first creates an emulsified base that’s crucial for silky texture. Don’t skip this step or add everything at once.
Insufficient Seasoning: Hummus requires more salt than you might expect. Under-seasoned hummus tastes flat and bland. Season generously and taste multiple times during preparation.
Old or Low-Quality Spices: Stale cumin lacks the earthy warmth that defines great hummus. Check your spice dates and replace annually for optimal flavor.
Not Adjusting Consistency: Hummus thickens as it refrigerates. If serving later, make it slightly thinner than desired, knowing it will firm up.
Storing Tips for the Recipe
Proper storage ensures your homemade hummus stays fresh and delicious:
Refrigerator Storage: Transfer hummus to an airtight container, smoothing the top and covering with a thin layer of olive oil to prevent oxidation and drying. Properly stored hummus keeps for 5-7 days in the refrigerator, though it’s best consumed within 3-4 days for optimal freshness and flavor.
Preventing Browning: The olive oil layer creates a barrier against air exposure, which causes the surface to darken and develop off-flavors.
Freezer Storage: Hummus freezes surprisingly well for up to 4 months. Portion into individual servings in freezer-safe containers, leaving ½-inch headspace for expansion. Thaw overnight in the refrigerator and stir well before serving, adding a tablespoon of water if needed to restore consistency.
Bringing to Room Temperature: For best flavor, remove hummus from the refrigerator 15-20 minutes before serving. Cold temperatures dull flavors and make the texture stiff.
Reviving Refrigerated Hummus: If your hummus has thickened in the fridge, simply stir in cold water, one tablespoon at a time, until you achieve the desired consistency again.
Conclusion
This 10-minute homemade hummus proves that the best things in life don’t have to be complicated or time-consuming. By following these straightforward steps, you’ll create a chickpea dip recipe that’s fresher, healthier, and more flavorful than anything you’ll find at the store – and you’ll save money in the process. The beauty of this Middle Eastern hummus lies in its simplicity and versatility, making it perfect for everything from casual snacking to elegant entertaining. Once you experience the vibrant, nutty flavor and impossibly creamy texture of homemade hummus, you’ll never go back to store-bought versions filled with preservatives and stabilizers. So grab your food processor, gather these simple ingredients, and transform your kitchen into a hummus haven. Don’t forget to share your creations with us in the comments below, and explore our other quick and healthy recipes that prove homemade always tastes better!
FAQs
Can I make hummus without tahini?
Yes, though tahini provides the authentic nutty flavor and creamy texture that defines traditional hummus. You can substitute sunflower seed butter, almond butter, or even Greek yogurt, but the flavor profile will change. For a tahini-free version, increase the olive oil slightly and add extra lemon juice to compensate for the missing richness.
Why is my homemade hummus grainy or gritty?
Grainy texture typically results from insufficient processing time. Blend your hummus for at least 4-6 minutes total, scraping down the sides regularly. Using ice-cold water instead of room temperature water also dramatically improves texture by helping create a smooth emulsion. If problems persist, try removing the chickpea skins for ultra-smooth results.
How can I make my hummus more flavorful?
The key is proper seasoning with salt, fresh lemon juice, and high-quality ingredients. Don’t be shy with salt – hummus requires generous seasoning to truly shine. You can also roast the garlic for sweeter depth, toast the cumin in a dry pan before adding, or incorporate flavor boosters like roasted red peppers, sun-dried tomatoes, or fresh herbs.
Can I use dried chickpeas instead of canned?
Absolutely! Cooking dried chickpeas from scratch actually produces superior texture and flavor. Soak 1 cup dried chickpeas overnight, then cook until very tender (this is key – they should easily mash between your fingers). Slightly overcooked chickpeas make smoother hummus than al dente ones. Save the cooking liquid to adjust consistency.
Is homemade hummus really healthier than store-bought?
Yes, significantly. Homemade hummus contains no preservatives, stabilizers, or artificial ingredients. You control the sodium content (typically 40-50% less than commercial brands), oil quality, and freshness. Store-bought varieties often contain citric acid, potassium sorbate, and other additives for shelf stability. Homemade also provides superior nutritional value since ingredients haven’t been sitting on shelves for months, degrading vitamins and healthy fats.
What’s the best way to fix hummus that’s too thick or too thin?
If your hummus is too thick, simply blend in cold water or reserved chickpea liquid (aquafaba), one tablespoon at a time, until you reach the desired consistency. If it’s too thin, blend in additional chickpeas or a tablespoon of tahini to thicken it while maintaining flavor balance. Remember that hummus thickens as it chills, so slightly thinner is better when making ahead.