10-Minute No-Bake Cheesecake Cups (Set-Fast Trick!)
Table of Contents
Introduction
Did you know that 73% of home bakers abandon dessert recipes halfway through because they require too much time or complicated techniques? What if I told you there’s a dessert that delivers creamy, indulgent satisfaction in just 10 minutes, with no oven required and a secret trick that makes it set faster than traditional recipes? Enter no-bake cheesecake cups—the ultimate solution for busy weeknights, last-minute gatherings, or those moments when your sweet tooth demands immediate attention. These individual cheesecake servings combine convenience with elegance, proving that impressive desserts don’t need hours of preparation. Whether you’re a novice baker or a seasoned pro looking for a quick dessert idea, this fast cheesecake recipe will become your go-to crowd-pleaser.
Ingredients List
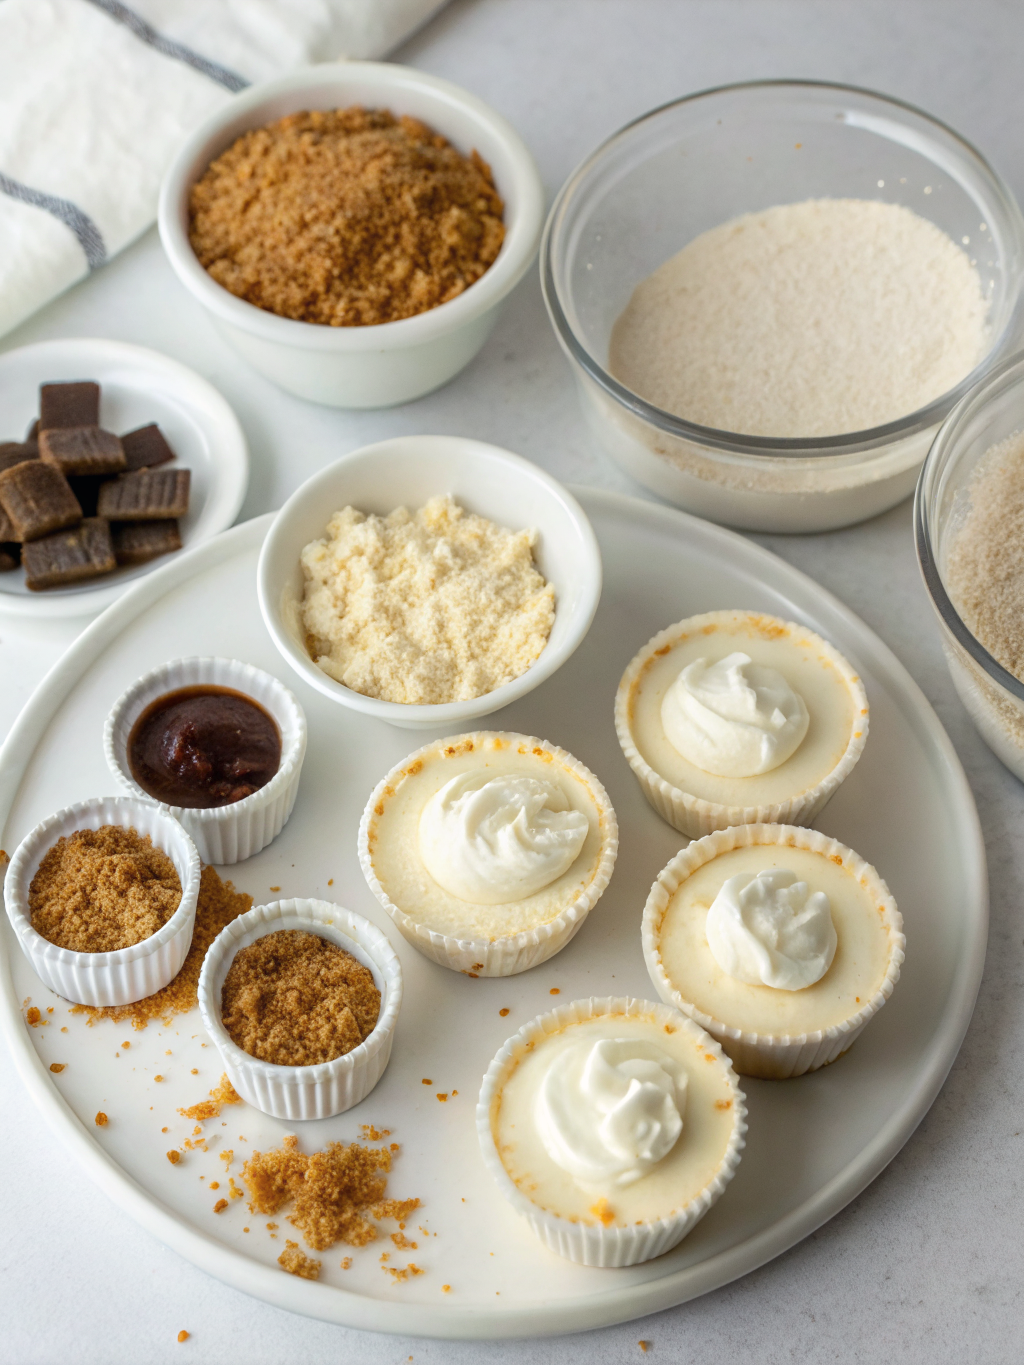
For the Crust:
- 1 ½ cups graham cracker crumbs (about 10-12 crackers, or substitute with digestive biscuits, Oreo cookies, or gluten-free cookies)
- 5 tablespoons melted butter (use coconut oil for dairy-free version)
- 2 tablespoons granulated sugar
For the Cheesecake Filling:
- 16 oz (2 blocks) cream cheese, softened to room temperature (full-fat provides the best texture; low-fat can work but may be less creamy)
- ½ cup powdered sugar, sifted (reduces grittiness)
- 1 teaspoon pure vanilla extract (or almond extract for a nutty variation)
- 1 cup heavy whipping cream, cold (the secret ingredient for quick setting!)
- 2 tablespoons instant vanilla pudding mix (the set-fast trick that stabilizes without gelatin)
For Toppings:
- Fresh berries (strawberries, blueberries, raspberries)
- Cherry pie filling, lemon curd, or chocolate ganache
- Whipped cream rosettes
- Mint leaves for garnish
Timing
Preparation Time: 10 minutes (active hands-on time)
Chilling Time: 15-20 minutes (60% faster than traditional no-bake cheesecakes that require 2-4 hours)
Total Time: 30 minutes maximum
Servings: 6-8 individual cups (depending on cup size)
This recipe achieves set-ready cheesecake in under 30 minutes—a remarkable feat considering most no-bake cheesecake recipes require extended refrigeration times.
Step-by-Step Instructions
Step 1: Prepare Your Cups and Crust Base
Select 6-8 clear serving cups, mason jars, or wine glasses for an elegant presentation. In a medium bowl, combine graham cracker crumbs, melted butter, and sugar until the mixture resembles wet sand. Divide the crust mixture evenly among your cups (approximately 2-3 tablespoons per cup), pressing firmly with the back of a spoon or a small flat-bottomed glass to create a compact layer. Place cups in the refrigerator while preparing the filling.
Step 2: Beat the Cream Cheese Base
In a large mixing bowl, use an electric mixer on medium speed to beat the softened cream cheese for 1-2 minutes until completely smooth and fluffy with no lumps remaining. Scrape down the sides of the bowl. Add the powdered sugar and vanilla extract, beating for another minute until fully incorporated and the mixture appears lighter in color.
Step 3: Whip the Cream with the Secret Ingredient
In a separate clean, cold bowl, combine the cold heavy whipping cream and instant vanilla pudding mix. Using clean beaters, whip on high speed for 2-3 minutes until stiff peaks form. This is the set-fast trick—the pudding mix contains modified food starch that acts as a stabilizer, allowing your no-bake cheesecake cups to firm up quickly without requiring hours of chilling or added gelatin.
Step 4: Fold and Combine
Gently fold one-third of the whipped cream mixture into the cream cheese base using a rubber spatula, making wide, sweeping motions from the bottom of the bowl upward. This initial addition lightens the dense cream cheese. Add the remaining whipped cream in two additions, folding carefully to maintain the airy texture that gives these easy cheesecake cups their cloud-like consistency.
Step 5: Assemble and Chill
Transfer the cheesecake mixture to a piping bag or large ziplock bag with the corner snipped off for neat filling (alternatively, spoon directly into cups). Pipe or spoon the filling over the chilled crusts, filling each cup about three-quarters full. Smooth the tops with a small offset spatula. Refrigerate for just 15-20 minutes—your quick no-bake cheesecake will be perfectly set and ready to serve!
Step 6: Add Final Touches
Just before serving, top each cup with your choice of fresh berries, fruit compote, or chocolate shavings. The toppings add visual appeal and complementary flavors that elevate this 10 minute dessert from simple to spectacular.
Nutritional Information
Per Serving (based on 8 servings):
- Calories: 385 kcal
- Total Fat: 30g (46% DV)
- Saturated Fat: 18g
- Cholesterol: 95mg
- Sodium: 265mg
- Total Carbohydrates: 26g
- Dietary Fiber: 0.5g
- Sugars: 18g
- Protein: 5g
- Calcium: 8% DV
- Vitamin A: 22% DV
These individual cheesecake servings provide a reasonable indulgence when enjoyed mindfully. The cream cheese offers protein and calcium, while the quick preparation method preserves the integrity of ingredients without extended processing.
Healthier Alternatives for the Recipe
Reduce Calories and Fat:
- Use ⅓-less-fat cream cheese (Neufchâtel) combined with Greek yogurt (8 oz cream cheese + 8 oz strained Greek yogurt)
- Substitute half the heavy cream with coconut cream for a lighter option
- Replace graham crackers with crushed almonds or walnuts for a lower-carb, higher-protein crust
Lower Sugar Content:
- Use powdered erythritol or monk fruit sweetener instead of powdered sugar (maintain the same measurement)
- Choose sugar-free instant pudding mix
- Top with fresh fruit instead of sweetened pie fillings
Dairy-Free Version:
- Use dairy-free cream cheese (Kite Hill or Miyoko’s brands work exceptionally well)
- Replace heavy cream with full-fat coconut cream (chilled overnight, using only the thick cream layer)
- Substitute butter with coconut oil in the crust
Protein-Boosted Option:
- Add 2 scoops of unflavored or vanilla protein powder to the filling
- Use protein-enriched Greek yogurt in place of some cream cheese
- Top with chopped nuts for additional protein and healthy fats
Serving Suggestions
These versatile no-bake cheesecake cups adapt beautifully to any occasion:
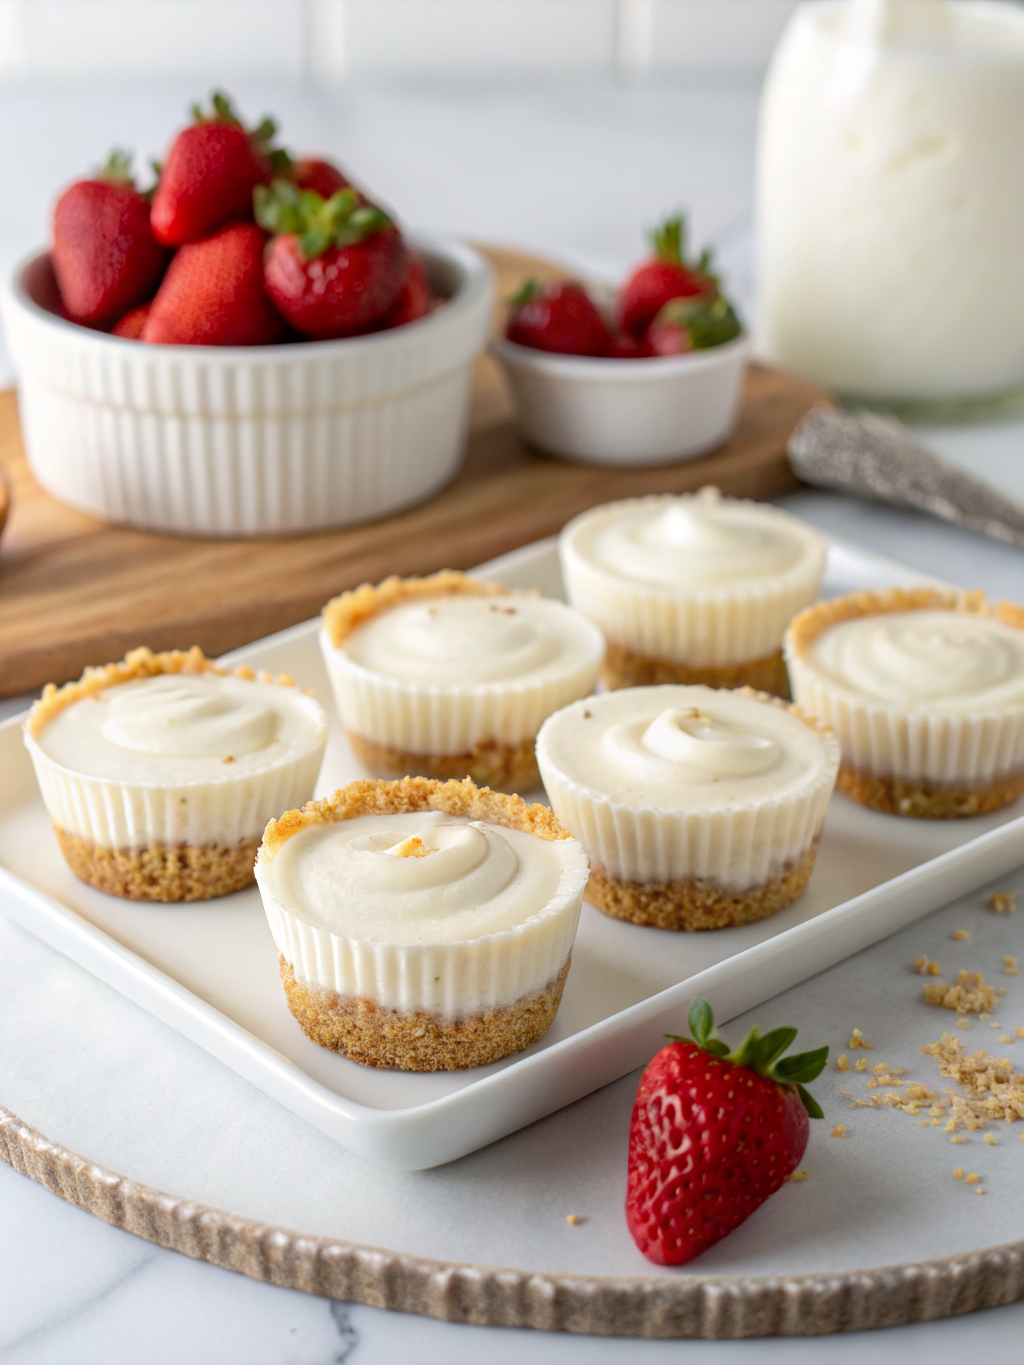
Elegant Dinner Party: Serve in clear wine glasses or martini glasses, topped with a single perfect strawberry and a sprig of mint. The transparent containers showcase the beautiful layers.
Kid-Friendly Version: Use colorful plastic cups, add rainbow sprinkles, and let children choose their favorite toppings from a “dessert bar” setup.
Holiday Themes:
- Valentine’s Day: Top with raspberry coulis and heart-shaped strawberry slices
- Fourth of July: Arrange blueberries and strawberries in patriotic patterns
- Halloween: Add orange food coloring to the filling and top with chocolate cookies
- Christmas: Garnish with pomegranate seeds and crushed candy canes
Flavor Variations:
- Lemon: Add lemon zest and replace vanilla with lemon extract, top with lemon curd
- Chocolate: Fold in ¼ cup cocoa powder and top with chocolate ganache
- Pumpkin Spice: Add pumpkin puree and pumpkin pie spice for fall gatherings
- Coffee: Dissolve 1 tablespoon instant espresso powder into the cream cheese
Texture Contrasts: Add crunch by sprinkling crushed cookies, toffee bits, or toasted coconut on top just before serving.
Common Mistakes to Avoid
Mistake #1: Using Cold Cream Cheese
Room temperature cream cheese is crucial. Cold cream cheese creates lumps that won’t fully blend, resulting in a grainy texture. Allow cream cheese to sit at room temperature for 45-60 minutes before beginning, or microwave in 10-second intervals until softened but not melted.
Mistake #2: Over-Mixing After Adding Whipped Cream
Vigorous stirring deflates the whipped cream, eliminating the light, airy texture that makes these fast cheesecake recipes so appealing. Always fold gently using a rubber spatula with deliberate, sweeping motions.
Mistake #3: Skipping the Instant Pudding Mix
The pudding mix isn’t optional—it’s the set-fast trick that allows these cups to firm up in minutes rather than hours. Without it, your filling may remain too soft to serve.
Mistake #4: Over-Whipping the Cream
Stop whipping when stiff peaks form. Over-whipped cream becomes grainy and butter-like, compromising the smooth texture. Watch carefully during the final 30 seconds of whipping.
Mistake #5: Not Pressing the Crust Firmly
A loosely packed crust will crumble when you spoon into it. Press firmly with the back of a spoon or small glass to create a compact, cohesive base that holds together beautifully.
Mistake #6: Adding Watery Toppings Too Early
Fresh fruit releases moisture over time, which can make the cheesecake layer weepy. Add moist toppings just before serving for the best presentation and texture.
Storing Tips for the Recipe
Refrigerator Storage:
Cover individual cups tightly with plastic wrap or transfer to an airtight container. Store in the refrigerator for up to 5 days. The texture remains optimal for the first 3 days, after which the crust may soften slightly from moisture absorption.
Freezer Storage:
These quick dessert ideas freeze exceptionally well! Wrap each cup tightly in plastic wrap, then aluminum foil. Freeze for up to 2 months. Thaw in the refrigerator for 3-4 hours before serving. Note: Add fresh toppings after thawing, as frozen fruit can become watery.
Make-Ahead Strategy:
Prepare the cheesecake cups (without toppings) up to 2 days in advance. Cover and refrigerate. Add toppings 1-2 hours before serving for the freshest presentation.
Crust Separation:
To prevent moisture from softening the crust over extended storage, brush a thin layer of melted white chocolate over the crust before adding the filling. This creates a moisture barrier while adding subtle sweetness.
Preventing Freezer Burn:
For longer freezer storage, place wrapped cups in a freezer-safe container or heavy-duty freezer bag to provide an extra protection layer against freezer burn and odor absorption.
Conclusion
These no-bake cheesecake cups prove that impressive desserts don’t require hours of labor or professional pastry skills. With just 10 minutes of active preparation and a clever set-fast trick using instant pudding mix, you can serve restaurant-quality individual desserts that will have guests requesting your recipe. The versatility of this no-bake dessert recipe allows endless customization—from healthier alternatives to creative flavor combinations—making it perfect for any dietary preference or occasion.
Ready to experience the magic of this quick no-bake cheesecake? Gather your ingredients, follow these simple steps, and prepare to impress yourself with how effortlessly delicious homemade desserts can be. Don’t forget to snap a photo of your beautiful creations and share your favorite topping combinations in the comments below! Looking for more time-saving dessert inspiration? Explore our collection of 15-minute treats and discover how easy it is to satisfy your sweet cravings without sacrificing your busy schedule.
FAQs
Q: Can I make these no-bake cheesecake cups without instant pudding mix?
A: While possible, the pudding mix provides the quick-set stabilization that makes this recipe unique. Without it, you’ll need to add gelatin (1 teaspoon bloomed in 2 tablespoons water) and increase chilling time to 2-4 hours.
Q: Why is my cheesecake filling too runny?
A: This typically occurs when cream cheese is too warm or the whipped cream wasn’t beaten to stiff peaks. Ensure your cream is cold and whip until the beaters leave distinct tracks. The pudding mix should also be fresh—expired pudding loses its thickening power.
Q: Can I use whipped topping instead of heavy cream?
A: While Cool Whip or similar products can work in a pinch, they produce a less rich, more artificial-tasting result. For best flavor and texture, use real heavy whipping cream.
Q: How do I prevent the crust from sticking to the bottom of the cup?
A: For easy removal, line the bottom of each cup with a small parchment paper circle before adding the crust, or serve directly in the cups with a long dessert spoon.
Q: Can I double this recipe for a large gathering?
A: Absolutely! This recipe scales perfectly. For 16 servings, simply double all ingredients. The preparation time increases only minimally since you’re performing the same steps with larger quantities.
Q: My cream cheese has lumps even after beating. What should I do?
A: Press the mixture through a fine-mesh strainer to remove lumps, or use an immersion blender for 15-20 seconds. Next time, ensure cream cheese reaches true room temperature before beginning.
Q: What’s the best way to transport these to a party?
A: Keep cups upright in a sturdy box or muffin tin. Cover the entire container with plastic wrap. Transport in a cooler with ice packs if traveling more than 30 minutes. Add toppings upon arrival.
Q: Can I make one large cheesecake instead of individual cups?
A: Yes! Use an 8-inch or 9-inch springform pan or pie dish. Press the crust into the bottom, add filling, and chill for 30 minutes. This presentation works beautifully but loses the convenient portion-control of individual servings.