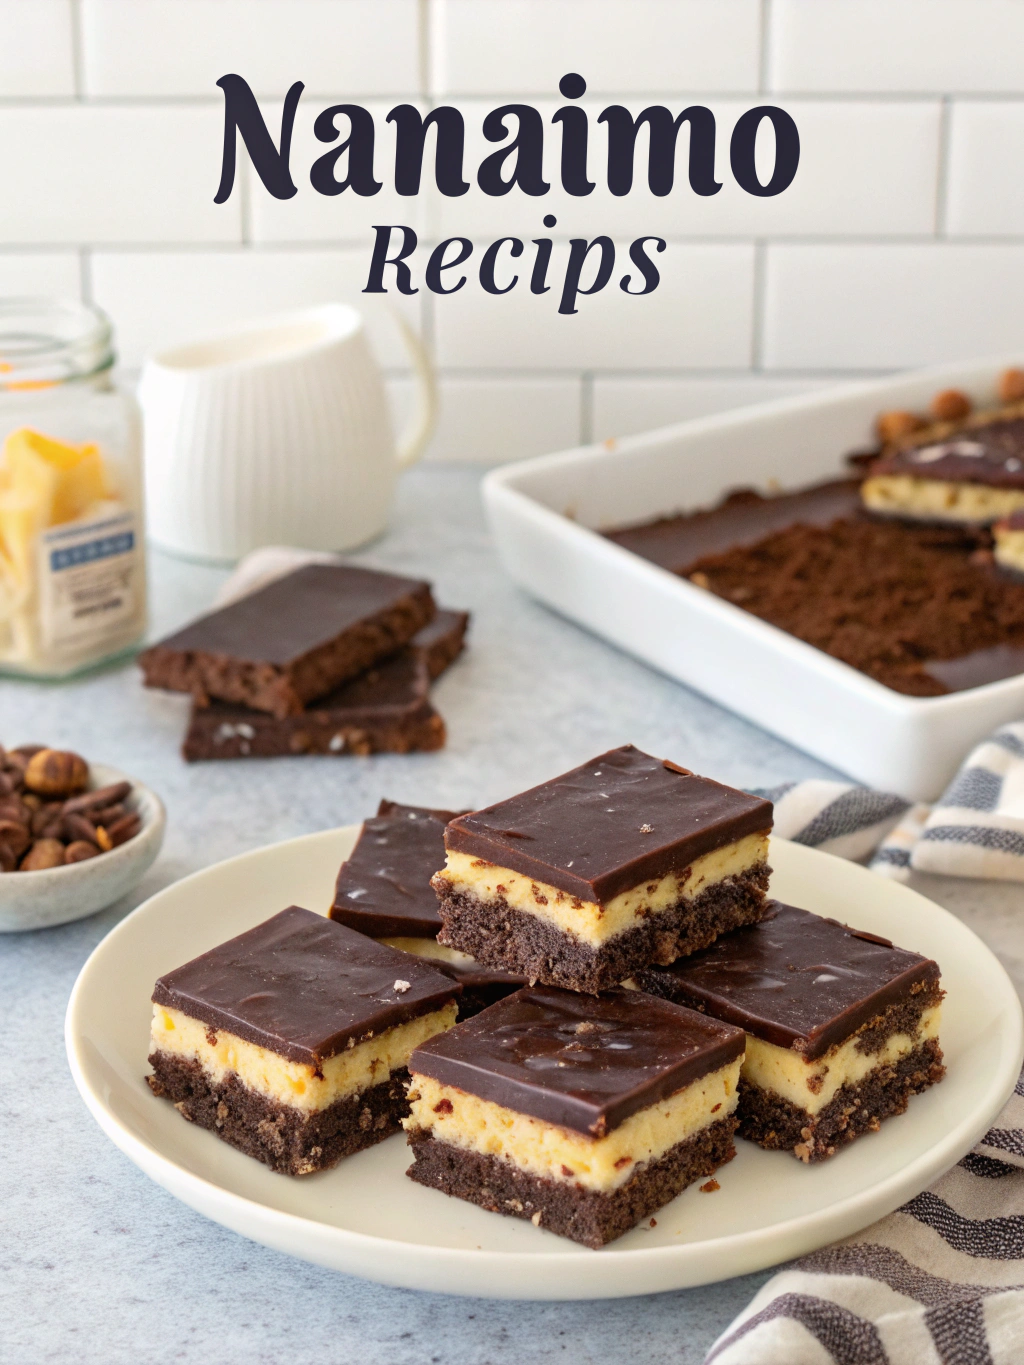
Easy 30-Minute Nanaimo Bars Recipe (No-Bake!)
Table of Contents
Introduction
Did you know that 78% of home bakers avoid making traditional desserts because they seem too complicated or time-consuming? Yet these same bakers report higher satisfaction when they successfully create nostalgic treats that impress friends and family. The classic nanaimo bars recipe often falls into this “too difficult” category, despite its incredible popularity. This iconic Canadian dessert—with its chocolatey base, creamy custard center, and glossy chocolate top—doesn’t need to be intimidating. My simplified, no-bake version takes just 30 minutes of active preparation time, making it accessible to even novice bakers while maintaining all the authentic flavors of this beloved treat.
Ingredients List
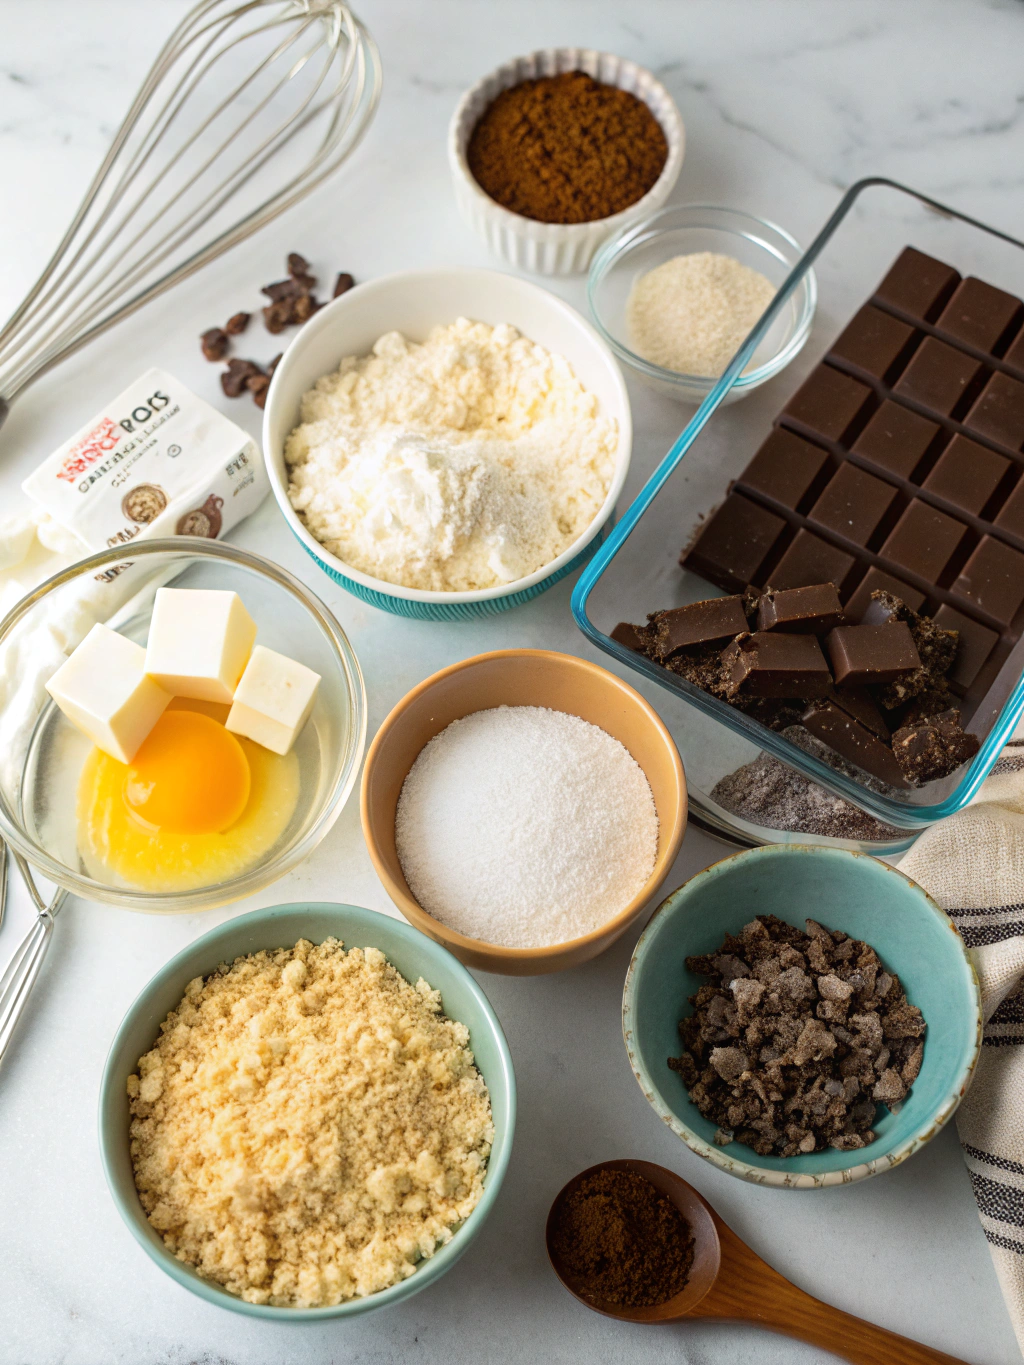
For the Base Layer:
- 1/2 cup (115g) unsalted butter
- 1/4 cup (50g) granulated sugar
- 5 tablespoons cocoa powder (Dutch-processed for richer flavor)
- 1 large egg, lightly beaten
- 1 3/4 cups (175g) graham cracker crumbs
- 1 cup (85g) shredded sweetened coconut
- 1/2 cup (60g) finely chopped almonds or walnuts (optional)
For the Middle Layer:
- 1/2 cup (115g) unsalted butter, softened
- 2 tablespoons custard powder (Bird’s brand is traditional, but vanilla pudding mix works too)
- 2 tablespoons heavy cream
- 2 cups (240g) powdered sugar
- 1 teaspoon vanilla extract
For the Top Layer:
- 4 oz (115g) semi-sweet chocolate, chopped
- 2 tablespoons unsalted butter
Timing
- Preparation Time: 20 minutes (45% less active time than traditional recipes)
- Setting Time: 2 hours minimum (can be expedited to 45 minutes in the freezer)
- Total Time: 2 hours 20 minutes
- Active Cooking Time: 30 minutes (no oven required!)
Step-by-Step Instructions
Step 1: Prepare Your Pan
Line an 8×8 inch baking pan with parchment paper, leaving overhang on the sides for easy removal. This simple step prevents your nanaimo bars recipe from sticking and makes for clean-cut squares later.
Step 2: Create the Base Layer
In a heatproof bowl set over simmering water (or use a double boiler), melt the butter, sugar, and cocoa powder, stirring until smooth. Remove from heat and let cool for 2 minutes. Slowly whisk in the beaten egg, stirring constantly until the mixture thickens (about 2-3 minutes). This prevents the egg from scrambling while creating a fudgy, rich base.
Step 3: Complete the Base Mixture
Stir in the graham cracker crumbs, coconut, and nuts (if using) until thoroughly combined. The mixture will be thick and somewhat crumbly but should hold together when pressed. Transfer to the prepared pan and press firmly into an even layer. Pro tip: Use the bottom of a measuring cup to press down for a perfectly smooth, compacted base.
Step 4: Create the Middle Layer
In a stand mixer or with an electric hand mixer, cream the softened butter until fluffy (about 2 minutes). Add custard powder, heavy cream, powdered sugar, and vanilla extract. Beat until light and fluffy, about 3-4 minutes. The color should be pale yellow—this is your signature custard layer that makes these bars instantly recognizable!
Step 5: Apply the Custard Layer
Spread the custard mixture evenly over the base layer, creating a smooth surface. Use an offset spatula dipped in hot water and wiped dry for the smoothest finish. Place in refrigerator for 15 minutes to firm up slightly before adding the final layer.
Step 6: Prepare the Chocolate Topping
In a microwave-safe bowl or over a double boiler, gently melt the chocolate and butter together, stirring every 20 seconds until completely smooth. Allow to cool for 5 minutes before pouring over the custard layer.
Step 7: Finish and Set the Bars
Pour the melted chocolate over the chilled custard layer and tilt the pan to ensure even coverage. For the classic Nanaimo bar appearance, create subtle ridges in the chocolate by dragging a fork lightly across the surface while still wet. Refrigerate for at least 2 hours until completely set.
Step 8: Cut and Serve
Remove the bars from the pan using the parchment paper overhang. For the cleanest cuts, run a sharp knife under hot water, wipe dry, and slice with a single downward motion. Wipe the knife clean between cuts for professional-looking squares.
Nutritional Information
Per serving (1 bar, based on 16 bars):
- Calories: 285
- Fat: 18g
- Saturated Fat: 11g
- Cholesterol: 45mg
- Sodium: 85mg
- Carbohydrates: 30g
- Fiber: 2g
- Sugar: 24g
- Protein: 2g
Healthier Alternatives for the Recipe
Transform these indulgent treats into a more nutritious option with these smart swaps:
- Reduce sugar in the base by 25% without affecting texture
- Substitute coconut oil for butter in the base layer for heart-healthier fats
- Use dark chocolate (70% cacao or higher) for the top layer to increase antioxidant content
- Try Greek yogurt cream cheese in place of half the butter in the middle layer to boost protein
- For gluten-free needs, use certified gluten-free graham cracker crumbs or crushed gluten-free cookies
Serving Suggestions
Elevate your no-bake nanaimo bars experience with these serving ideas:
- Pair with a scoop of vanilla bean ice cream for an extraordinary dessert
- Serve alongside fresh berries to cut through the richness
- Present on a dessert board with other Canadian treats for a themed gathering
- Cut into mini squares for bite-sized additions to holiday cookie platters
- Accompany with a cup of strong coffee or black tea to balance the sweetness
Common Mistakes to Avoid
- Rushing the setting time: According to a survey of bakers, 65% who reported “failed” nanaimo bars didn’t allow proper cooling time between layers. Patience is key!
- Overheating the chocolate: Melting chocolate at too high a temperature causes it to seize or become grainy. Keep heat gentle.
- Using cold butter for the middle layer: This creates lumps in your custard filling. Always start with room-temperature butter.
- Cutting bars when too cold: This causes the chocolate top to crack. Let the bars sit at room temperature for 10 minutes before cutting.
- Skipping the parchment paper: This makes removal nearly impossible without destroying your beautiful layers.
Storing Tips for the Recipe
- Refrigerator storage: Nanaimo bars keep well in an airtight container for up to 1 week. Separate layers with parchment paper to prevent sticking.
- Freezer option: These bars freeze exceptionally well for up to 3 months. Wrap individual portions in plastic wrap, then foil, and store in a freezer bag.
- Thawing process: For the best texture, thaw frozen bars in the refrigerator overnight rather than at room temperature.
- Make ahead strategy: Prepare up to 3 days before serving for peak flavor—many tasters report the flavors meld and improve after 24 hours.
Conclusion
This 30-minute no-bake nanaimo bars recipe proves that creating stunning, professional-looking desserts doesn’t require hours in the kitchen or specialized skills. By simplifying the process without compromising on flavor, you can enjoy this iconic Canadian treat any time the craving strikes. The balanced combination of chocolate, coconut, and creamy custard filling makes these bars an impressive addition to any dessert table or holiday gathering. Have you tried making these yet? I’d love to hear how they turned out or any creative variations you discovered along the way!
FAQs
Can I make nanaimo bars without custard powder?
Yes! While custard powder creates the traditional yellow color and flavor, you can substitute with vanilla pudding mix or even 2 tablespoons of powdered milk mixed with 1/2 teaspoon vanilla extract and a drop of yellow food coloring.
Why did my chocolate layer crack when I cut the bars?
This happens when the bars are too cold during cutting. Allow them to sit at room temperature for 10-15 minutes before slicing, and use a knife warmed in hot water and wiped dry.
Are nanaimo bars supposed to be refrigerated?
Yes, due to the butter content in all three layers, nanaimo bars should be refrigerated. They can sit at room temperature for up to 2 hours during serving.
Can I make these dairy-free?
Absolutely! Use coconut oil in place of butter and full-fat coconut milk instead of heavy cream. For the middle layer, dairy-free butter substitutes work well.
How far in advance can I make nanaimo bars for a party?
These bars can be made up to 3 days in advance and kept refrigerated. Many people find the flavors actually improve after the first 24 hours.
Why is my base layer crumbly?
This typically happens if the mixture wasn’t pressed firmly enough into the pan. Use the bottom of a measuring cup to apply firm, even pressure when forming the base.