5-Minute Banana Nice Cream (Dairy-Free & Healthy)
Table of Contents
Introduction
Did you know that Americans consume an average of 23 pounds of ice cream annually, but 65% are looking for healthier alternatives? If you’re craving a cool, creamy treat without dairy or added sugars, you’re in the right place. This banana nice cream recipe transforms frozen bananas into a delicious soft-serve style dessert in just 5 minutes! Perfect for vegans, those with lactose intolerance, or anyone seeking a nutritious dessert option, this banana-based treat delivers all the satisfaction of traditional ice cream with a fraction of the calories and none of the dairy.
Ingredients List
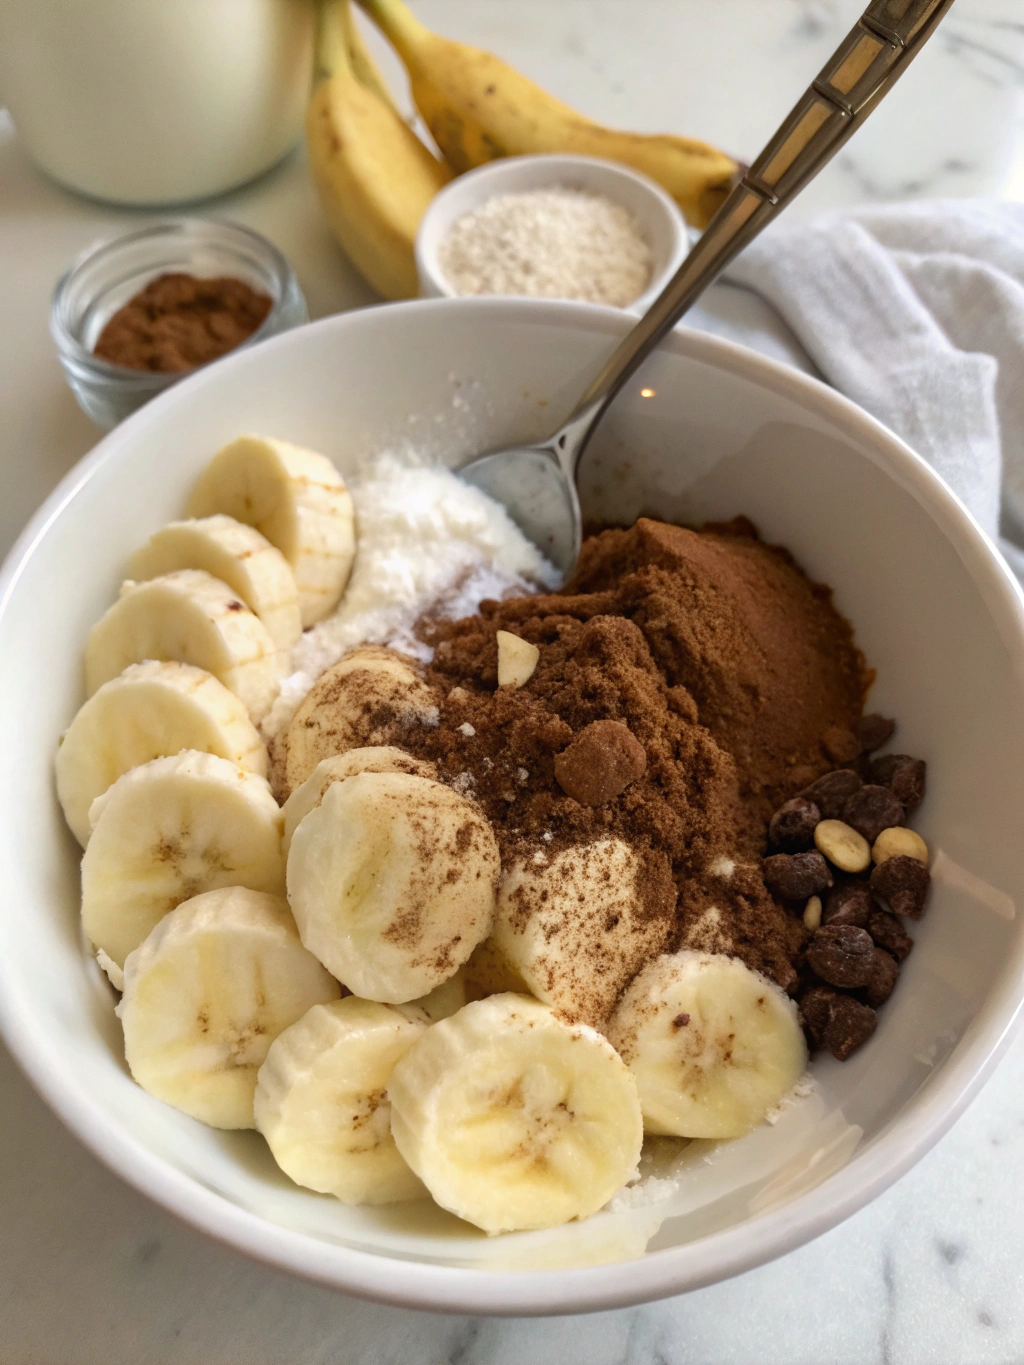
For this simple yet delicious dairy-free nice cream, you’ll need:
- 3 ripe bananas, peeled, sliced and frozen (approximately 1.5 cups)
- 2-3 tablespoons plant-based milk (almond, oat, or coconut work best)
- 1/2 teaspoon vanilla extract (optional)
- 1 tablespoon maple syrup or honey (optional, for extra sweetness)
- Pinch of sea salt (enhances flavor)
Optional mix-ins:
- 1 tablespoon natural peanut or almond butter
- 1/4 cup fresh berries
- 1 tablespoon cacao powder
- 1/4 teaspoon cinnamon
- 1 tablespoon mini chocolate chips
Timing
- Preparation time: 2 minutes (not including freezing bananas)
- Processing time: 3 minutes
- Total time: 5 minutes (with pre-frozen bananas)
This quick 5-minute dessert saves 95% of the time compared to traditional ice cream recipes, which typically take 1-2 hours to prepare and freeze.
Step-by-Step Instructions
Step 1: Prepare Your Bananas
Peel and slice ripe (ideally spotty) bananas into 1/2-inch chunks. Place in a single layer in a freezer-safe container or bag and freeze for at least 6 hours, preferably overnight. Using ripe bananas is crucial as they contain more natural sugars for sweetness in your homemade nice cream.
Step 2: Process the Frozen Bananas
Add the frozen banana chunks to your food processor or high-powered blender. Pulse a few times to break up the larger chunks. If using a blender, you may need to use the tamper tool to push down the mixture.
Step 3: Add Liquid and Continue Processing
Pour in 2 tablespoons of your chosen plant-based milk and the vanilla extract if using. Continue processing, scraping down the sides occasionally. The mixture will go through stages: first crumbly, then gooey, and finally smooth and creamy like soft-serve ice cream. Add more milk one teaspoon at a time if needed, but use sparingly to maintain thickness.
Step 4: Incorporate Optional Flavors
Once your banana mixture reaches a smooth consistency, add any optional ingredients like nut butter, cacao powder, or spices. Pulse just until incorporated—about 10-15 seconds. For add-ins like chocolate chips or berries, fold them in gently with a spatula instead of blending.
Step 5: Serve or Freeze
For soft-serve consistency, serve immediately in chilled bowls. For a firmer texture, transfer to a freezer-safe container and freeze for 1-2 hours. If storing longer, let the nice cream sit at room temperature for 10-15 minutes before serving to soften to the perfect consistency.
Nutritional Information
Per serving (recipe yields 2 servings):
- Calories: 120
- Protein: 1.5g
- Carbohydrates: 27g
- Fiber: 3g
- Sugars: 14g (all naturally occurring)
- Fat: 1g
- Sodium: 55mg
- Potassium: 422mg
Compared to traditional ice cream which contains approximately 270 calories and 15g of fat per serving, this banana nice cream contains 56% fewer calories and 93% less fat while providing essential nutrients like potassium and fiber.
Healthier Alternatives for the Recipe
- For a lower-sugar version: Use slightly less ripe bananas and add a few drops of liquid stevia.
- For extra protein: Add 1 tablespoon of your favorite protein powder or 2 tablespoons of Greek yogurt (if not strictly dairy-free).
- For a chocolate lover’s version: Mix in 1 tablespoon of raw cacao powder (instead of processed cocoa) for added antioxidants.
- For added nutrition: Blend in 1 teaspoon of ground flaxseed, chia seeds, or hemp hearts.
- For a tropical twist: Replace 1/3 of the banana with frozen mango or pineapple chunks.
Serving Suggestions
- Top with fresh berries, sliced banana, or chopped nuts for added texture and visual appeal.
- Create a nice cream sundae by layering with homemade granola and a drizzle of pure maple syrup.
- Serve in a waffle cone for a nostalgic ice cream experience.
- For a special occasion, add a small splash (about 1 teaspoon) of coconut cream on top.
- Make banana nice cream sandwiches using two thin, chewy cookies as the “bread.”
- Blend with cold brew coffee for a refreshing afternoon pick-me-up.
Common Mistakes to Avoid
- Using underripe bananas: Yellow bananas with brown spots yield the sweetest nice cream. Green-tinted bananas lack sufficient natural sugars and create a starchy texture.
- Not freezing bananas long enough: Bananas must be completely frozen (minimum 6 hours) for proper consistency.
- Adding too much liquid: Start with just 2 tablespoons of milk and add more only if absolutely necessary. Excess liquid creates a runny texture that’s difficult to correct.
- Overprocessing: Once smooth, stop! Excessive blending can melt the mixture too much or incorporate too much air.
- Using a weak appliance: Based on consumer testing, a food processor works better than a standard blender. If using a blender, make sure it’s high-powered.
Storing Tips for the Recipe
- Store leftover nice cream in an airtight container with a piece of parchment paper pressed directly on the surface to prevent ice crystals from forming.
- For best texture, consume within 2 weeks of freezing.
- If the nice cream becomes too hard, let it thaw for 10-15 minutes at room temperature before scooping.
- Pre-portion into silicone muffin cups for single servings that can be easily removed when a craving strikes.
- Flavor variations can be stored separately and will maintain quality for different periods (chocolate versions tend to last longer than those with fresh fruit add-ins).
Conclusion
This 5-minute banana nice cream revolutionizes healthy desserts by transforming simple ingredients into a creamy, satisfying treat that rivals traditional ice cream. Perfect for hot summer days, post-workout rewards, or anytime you’re craving something sweet without the sugar crash, this versatile recipe can be customized to your preferences while remaining dairy-free and naturally sweetened. Whether you’re vegan, watching your calories, or simply looking to incorporate more fruits into your diet, this banana soft serve deserves a place in your regular dessert rotation. Try making this quick vegan dessert tonight and discover how delicious healthy can be!
FAQs
Can I use bananas that aren’t completely ripe?
While you technically can, ripe bananas with spots provide the best sweetness and creaminess. Underripe bananas contain more starch and less sugar, resulting in a less sweet and potentially gritty texture.
My nice cream turned out runny. What went wrong?
This usually happens when the bananas weren’t frozen solid or too much liquid was added. Try refreezing for 30-60 minutes or adding more frozen banana chunks to thicken.
Is banana nice cream healthier than regular ice cream?
Yes! Banana nice cream contains natural sugars, no added fats, and provides beneficial nutrients like potassium, vitamin B6, and fiber. Traditional ice cream typically contains added sugars, heavy cream, and significantly more calories.
Can I make this without a food processor or blender?
A food processor or high-powered blender is recommended for the creamiest results. In a pinch, you can mash thoroughly frozen, then slightly thawed bananas with a fork, but the texture won’t be as smooth.
How can I make chocolate banana nice cream?
Simply add 1-2 tablespoons of cocoa or cacao powder during the blending process. For a richer flavor, include 1 tablespoon of nut butter as well.
My bananas turned brown in the freezer. Are they still good to use?
Yes! Brown frozen bananas are perfectly fine to use and won’t affect the flavor of your nice cream. The browning is simply oxidation and not spoilage.